nedelja, 16. december 2012

GLAM-orous December at Tattered Angels

 Hello my dear bloggers! I hope you are doing ok. Many things happened lately and I was really unable to make any post. Now we are almost before Christmas and it's time to continue our Christmas jounery - we just have some moments left.....
I decided to make some projects for Tattered Angels december that are enriched with the Glimmer Glam and more precisely with the Chandelier  Glimmer Glam that is perfect for the Christmas projects as it gives to them an icy and festive look.
The first project is a Paper Ball Christmas tree. It's shinny and it has a puffy looking and yet so simple to make.


 My second project is one of mine Christmas surprise Ball. I wanted this one to be extremely vintage and the Glam here really helps because beside the glimmer it gives to the ball a "worn out glass" looking althought this aspect is more obvious when you see it in RL. The Ball has a name: A jingle bell surprise.


 I used an entire bottle of the Glam but it was worth spending it. The ball is totally covered and I used it ever on the resin stars...

I hope you liked my projects and I'll try to be back soon!

sobota, 24. november 2012

Prima idea book 2012

I'm proud to announce that I'm in the company of  the 21 artists from around the world in this wonderful pubblication - the Prima Idea Book 2012.
 Inside you will find a great way to realize projects from the most talented artists in the scrapbook world. This is a great  volume that encloses the best of the Prima inspiration.  Here are my projects that were selected for the book:

The Prima ring

 LO Curious

 Hatched Easter Wishes

Inside you'll find a lot of inspiration and how-tos to develop your creativity. It's a must have for every scrapbooker.
Have a nice weekend and enjoy with the Prima Idea book 2012.

ponedeljek, 19. november 2012

Guest designer for Ingvild Bolme

I'm honored to be the guest designer for the over talented Ingvild Bolme that is surely a source of a great inspiration.....


 Here is the interview from Ingvild's blog:

When did you discover paper craft, and why do you still create within this craft? 
I discovered this great paper art about 5 years ago and I continue in this journey because it offere me endless ways of expression and every time I'm doing it it's like the first time I did it: full of inspiration and prepared to follow new ideas.

Where do you find inspiration to your work?

I always try to make something new so sometimes I find myself thinking about how to use items and techniques in a new way.

Where, and when do you prefer to create, and how do you prefer to have it around you?
(
I always create in my scrap room and I love to do it with some good music that make my hands just go and create.

How does your scrap place usually look like? 

My scraproom is always a bit messy when I'm creating but I thnk this is just proper to creativity because sometimes even the mess contributes to a great final goal. Creativity is always free of rules.

Do you have any favorite Prima – Ingvild Bolme line products? 

I just love the Distressing Tool because it gives me the possibility to distress my projects in every way, every surface and every dimension.


 And here are the projects that I created inspired by Ingvild's extraordinary products and the Ingvild's view on my interpretation:

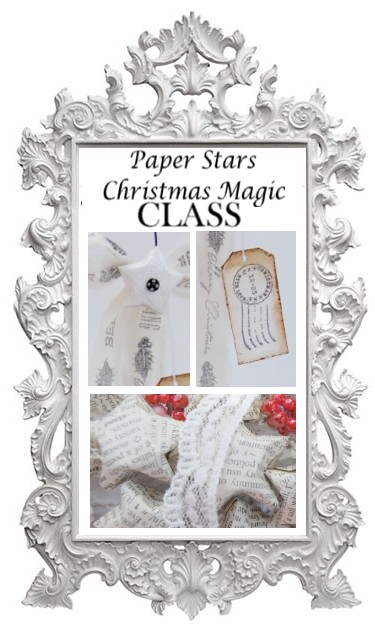
Christmas Surprise Ball

 Above; Jana made this wonderful Christmas surprise ball and so beautifully decorated it in winter and Christmas colors..
 Above; The beautifully distressed tag attached to the ball says "May all YOUR Christmases...". Jana used Comfort-Craft Tools - Distressing Tool and Chalk Edgers "Dark Rust" to achieve the vintage looking edges on the tag.

 Above; The creative altered ball can be opened, and inside Jana so amazingly creatively added three Junkyard Findings "Typo Bulbs" with the words "Love", "Family" and "memories" printed on, together with some thin cords, all set together as a fun cluster with an electricity look. Now, how clever is that?! On top of the cluster she added a vintage looking banner with the words "... be bright!" to finish the sentence from the tag attached outside of the ball. Also note how detailed she covered the inside of the whole ball, including the lid.
Above; A close-up of the cool and creative "electrical cluster" made of Junkyard Findings "Typo Bulbs" and cords looking like thin wires.
 Above; Chalk Edgers with chalk fluid ink from the Comfort-Craft Tools collection which are available in 40 different natural colors. Jana used the color "Dark Rust" on the her tag to achieve the brown colored edges.
Above; Comfort-Craft Distressing Tool. This is a multi functional tool with 7-8 tools in one! As on this image, it comes with two metal rasps, one fine and one rough. It can easily be replaced with a simple step. The rasp can be used on several soft materials for a distressed and "used" look. On the top of the tool there is a fine metal file, which gives a more soft effect then the rasp. On one side edge there is a metal edge scraper to scratch on paper edges etc, and on the other side of the tool there is a bone folder. The bone folder can be used to fold cards etc, and also as a "nail effect tool", which I like to use to press down paper edges etc instead of using my finger nails. With a simple pull you can take of the lid on the back of the tool. Underneath there you will find a metal brush to brush and scratch on paper, photo etc for a scratched and grunge look. On the tip of the lid there is a shape that can be used to rub on rub-ons. Jana used this Distressing Tool on her paper tag together with the Chalk Edger to achieve the vintage looking edges.   
Above; An amazing Christmas tree all created by the talented Jana! She decorated a Christmas tree shape with many tiny handmade frosted balls, colored with touches of Chalk Edger "Cold Ice". Look at this wonderful frosty looking Christmas tree! Isn't this beautiful and so creatively done?!

Above: Look at the amazing frosted details Jana made on this project. On the front of the tree she added the sentence "we believe" using Prima chipboard letters written "we" and a Junkyard Findings "Typo Bulbs" with the word "believe" on. I just LOVE the look of her tiny little blue balls! 
Above; The Junkyard Findings "Typo Bulbs" Jana used as a part of the sentence on her amazing winter project. These bulbs are totally flat on the backside, so they are "half bulbs", and fit perfectly on to all kinds of projects. Each pack has 6 bulbs with 6 different words printed on. They are not "breakable", they are solid and made of strong material. The Junkyard Findings bulbs are available also in two different designs, large vintage designs, and small sized ones. The large vintage ones are the ones Jana used on her Christmas ball shared in this post, and the small ones she used on the next project coming up here below.

 Above; Jana are not only talented on projects, but she also does amazing layouts. Here you can see "Smile", a wonderful layout with a happy theme and great little details. I really love how she use so much negative spaces combined with amazing tiny details to look at. Wonderful art in every way with lots of great techniques. And I love, love love the cool color combinations used here!
 Above; Here you can see how clever she used the "Small Typo Bulbs" from the Junkyard Findings collection. The thin cords with colors on are just amazing, truly creative and really inspiring!
Above; On many of the tiny little details Jana used Chalk Edgers in the color "Cold Ice" to add cool little touches. Really beautiful. Thank you Ingvild for hosting me on your blog and thank you for inspiring us with your products and especially with your marvelous art!

sreda, 14. november 2012

Back from Norway

Yes I'm back and my suitcase of memories is a lot fuller with great moments we spent up there :-)
Norway was so beatiful and the people were so kind and warm. It was really a pleasure and my whole family had a wonderful time. The great May Lis and Grethe that invited me at Papirfest were  great and they beside everything they also organised  for us some sightseeing of Stavanger which is so lovely and with a strong Norwegian athmospere. My son enjoyed the Stavanger Geopark and so it's really a place for everone!


 The girls attending theclasses were amazing and fast learners so it was a pleasure to create with them  and we were all sourrounded with Christmas music and doing a Christmas project so.... what si better than this?


 Here are the Christmas projects we created....


So again: Thank you May Lis and Grethe for taking care of everthing , thank you to Kari from the North Star Stamps for the stamps and inspiring moments, thank you Nina form the Norway Stamps for the stamps and our inspiring discussions and thank you to all that made this journey very special! I'm sure we'll meet again someday!

sobota, 3. november 2012

Frosty wishes canvas envelope

Here we go: the countdown to Christmas just started and the Tattered Angels month theme is peeeerfeeeect for this time of the year – Holidays bring family memories! That is so true and every family or union sure have a particular way to make this time special. The thing in my family that was necessary every Chrismas was always to make each year homemade chrismas cards. It always starts everything with discussing about what technique we’ll try and all together we develop our tiny christmas gift for the everday unreachable friends. This is the reason I had to represent this ingredient of our Christmas with a nice CC canvas envelope.


This time my Glimmer mists played with some crepe tape to make a real envelope border. First of all I covered the center of the envelope with the crepe tape anf left outside the border. Then I covered even that part with a separate tape and started to cut out stripes. I took care to immagine just the red ones. After all the cutting I sprayed with red mist. I also had at hand some paper towels to absorb all the excess of liquid right after spraying to avoid the mist going under the tape and ruining the pattern.


I took off all the tape stripes and covered the border once again and cut out new stripes  where the blue ones have to be placed. I repeat the spraying with a blue mist. Then I had to get a frosty look to the envelope so I also used some Chalk Chalkboard with a Glimmer screen to get a soft white background.


Here is the result: 


I hope you feel inspired! I'm waiting for you soon again!

četrtek, 1. november 2012

Come with me

Hello bloggers! How are you doing? I hope you are relaxing after the Halloween parties:-)

A few days ago I was inspired to make a layout in antique pink tons. I had a lovely picture of my mom going hand in hand with my boy and the title was inevitable: come with me.
As I didn't have some antique pink flowers and in fact they are quite difficult to find I transformed some nice purpre Prima flowers into a different ones. It was easy: I just painted them with some white primer and then covered them with Glimmer mists and Plain Jane Simply Sheer: I used 4 types of mists to obtain what I wanted: Walnut Gold and Route Glimmer mists and Rosey and Warm Green Simply Sheer. I also used some Tattered Angels Stained Glas to make the messy dots at the bottom of the page. The Paper is from the 7Gypsies collection POSTALE.


I want to remind everyone that I'll have classes in Stavanger, Norway on the 10th of November (Papirfest).


There are still some places available so you are very welcome to join me in some Christmas scented projects. For more information you can check here.

Have a great time!

četrtek, 25. oktober 2012

It's your day to shine


Hello everyone! Here si a new LO with a pic of my little one that was taken on his birthday and this is the reason of the title.I love this pic and the person who really shines out of it :-)
I did the page in white style. I used various 7 Gypsies elements like the Postale paper, Postale stickers and some parts of the Metal Hardware from CC.
A good brush with some white acrylic paint and a sparkle of Charcoal Chalkboard are a perfect combination and there are also some Tattered Angels Glimmer Screen signs.


Very short post this time.... More next time :-)

sobota, 20. oktober 2012

You are so pure


 Hello everyone! A new project..... This is a LO with a photo of my boy that I did some time ago. I love this picture because it express the essence of being a child. I decided to use the image like he is looking down, at the title of the page. I used a Prima trinket for part of the title and make the word "so" from a wire and painted with some white acrylic paint. I also added some painted wire swirls in the centre of the flowers to recall the wire technique of the litle word. For the background I used Simply Sheer Teal and Burlap and for the flowers the Patina and Aquamarine Glimmer mist.


 Thank  you so much for visiting! See you soon!

torek, 16. oktober 2012

1st day of school

This time I decided to make a LO because I had to capture a very important thing on it – my boy’s first day of school!I love to use the blues and turquoises on the LOs for my son because beside the fact that these are perfect boy colors they have a great airy and fresh effect.  First of all I blended the blue stripes with the Chalk Chalkboard. Than I used the Chalkboard Seven Seas for the background spots combined with the Burlap Simply Sheer to get a pinch of warmness. I colored the frame arround my boy with the Glimmer mist  Aquamarine using a thin brush.


Have a nice day!